


The instructions to build the boards are below:
Materials:
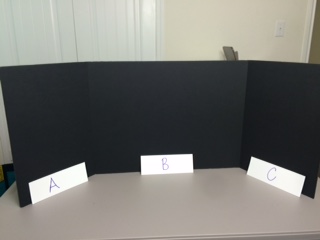
3 Project Display Boards cut in half
Command hooks:
36 Mini clear and 10 medium white
21 Sheet protectors
Colored Paper for printing signs
Spray adhesive
Finished Product: (Steps Below)
Step 1:
Cut the project boards in half.
Step 2:
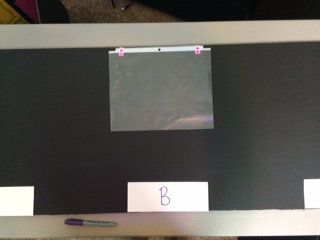
Using a sheet protector as a guide, position command hooks in the center of Section B.
Step 3:
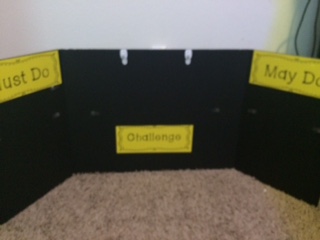
Use spray adhesive to glue the Must Do, May Do and Challenge labels to the board.
Step 4:
Repeat this process with all 5 boards.
Each station is slightly different, so the small clear hooks are positioned in different places. Follow the directions for each station board.
Individual Boards:
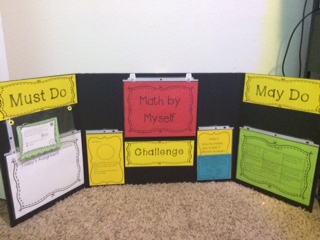
Math by Myself:
Cut 2 sheet protectors in half. Tape one side of the halves to create a pockets.
Section A:
Put a whole sheet protector on the bottom of section A. (This sheet is for Today’s Assignment.) Attach hooks.
Put a 1/2 sheet above the whole sheet for task cards. Punch holes in the top of the 1/2 sheet and attach hooks.
Section B
Put the two half sheets on either side of the title and challenge labels. Attach hooks.
Section C
Put a whole sheet protector on the bottom of section C. Attach hooks.
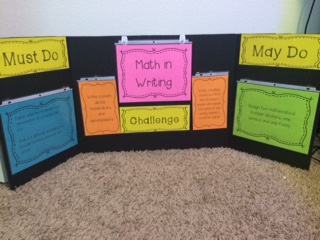
Math in Writing:
Cut 1 sheet protector in half. Tape one side of the halves to create a pockets.
Section A:
Put a whole sheet protector on the bottom of section A. Attach hooks.
Section B
Put the two half sheets on either side of the title and challenge labels. Attach hooks.
Section C
Put a whole sheet protector on the bottom of section C. Attach hooks.
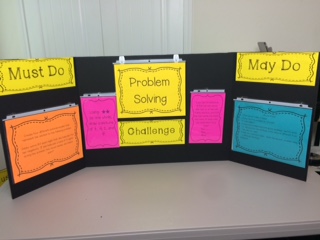
Problem Solving:
Cut 1 sheet protector in half. Tape one side of the halves to create a pockets.
Section A:
Put a whole sheet protector on the bottom of section A. Attach hooks.
Section B
Put the two half sheets on either side of the title and challenge labels. Attach hooks.
Section C
Put a whole sheet protector on the bottom of section C. Attach hooks.

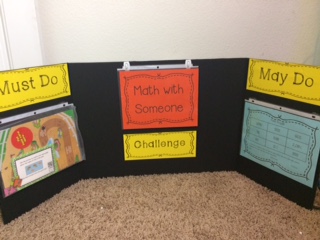
Math with Someone:
Section A:
Put a whole sheet protector on the bottom of section A. Attach hooks.
Section B
Put the two half sheets on either side of the title and challenge labels. Attach hooks.
Section C
Add a basket below challenge for task cards or puzzle games.
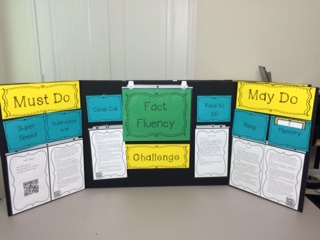
Fact Fluency:
6 Games are on this board- 2 in each section
Cut 3 sheet protectors in half. Tape one side of the halves to create a pockets.
Section A:
Put 2 1/2 sheet protectors on the bottom of section A. Put a command hook above each sheet protector for a game label. The labels are 1$ sheets. Attach hooks.
Section B
Put the two half sheets on either side of the title and challenge labels. Attach hooks. Put a command hook above each sheet protector for a game label. The labels are 1/4 sheets. Attach hooks.
Section C
Put 2 1/2 sheet protectors on the bottom of section A. Put a command hook above each sheet protector for a game label. The labels are 1$ sheets. Attach hooks.
This year, I plan to be prepared for the question, "What do I put in the stations?"!
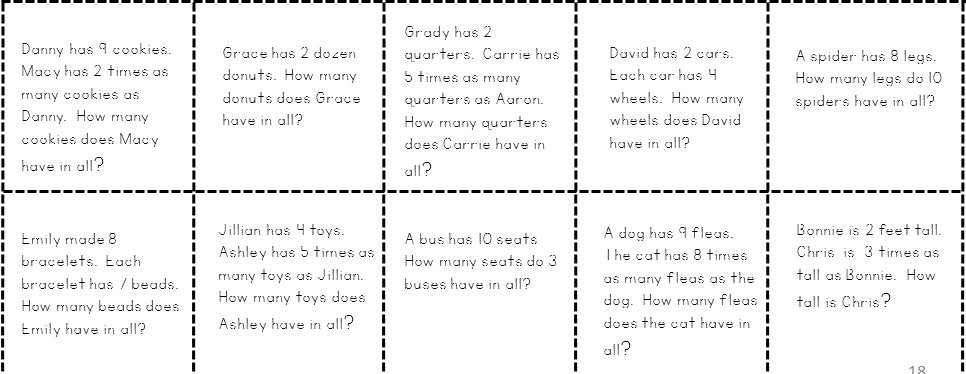
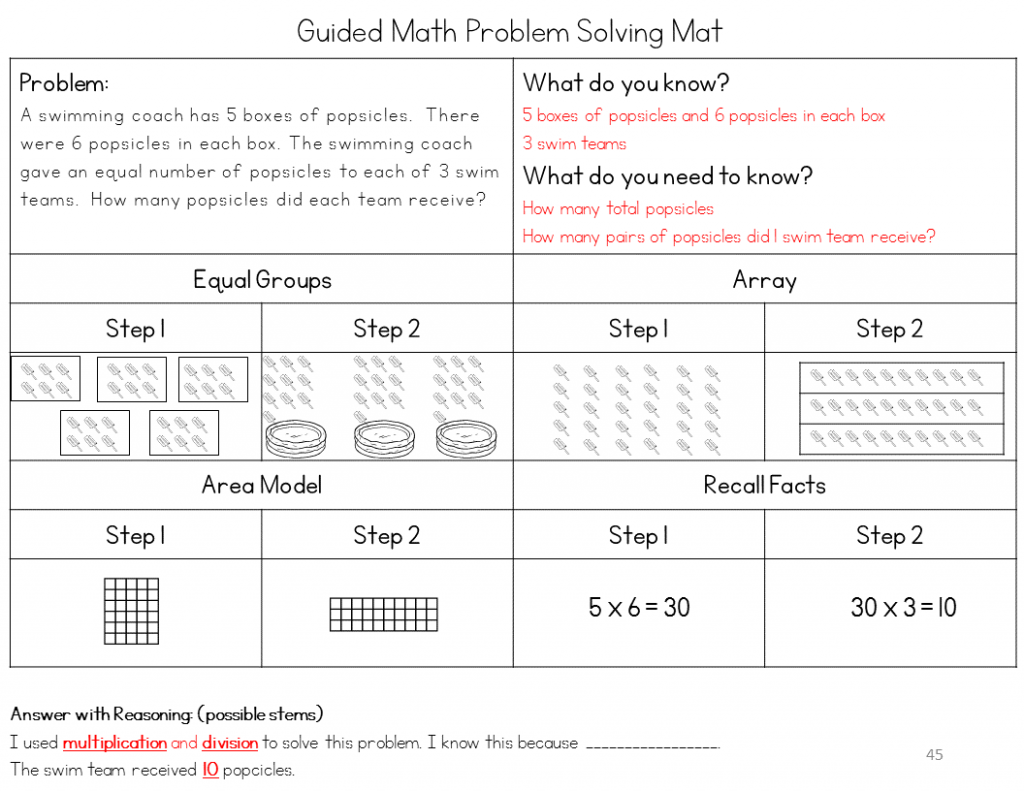
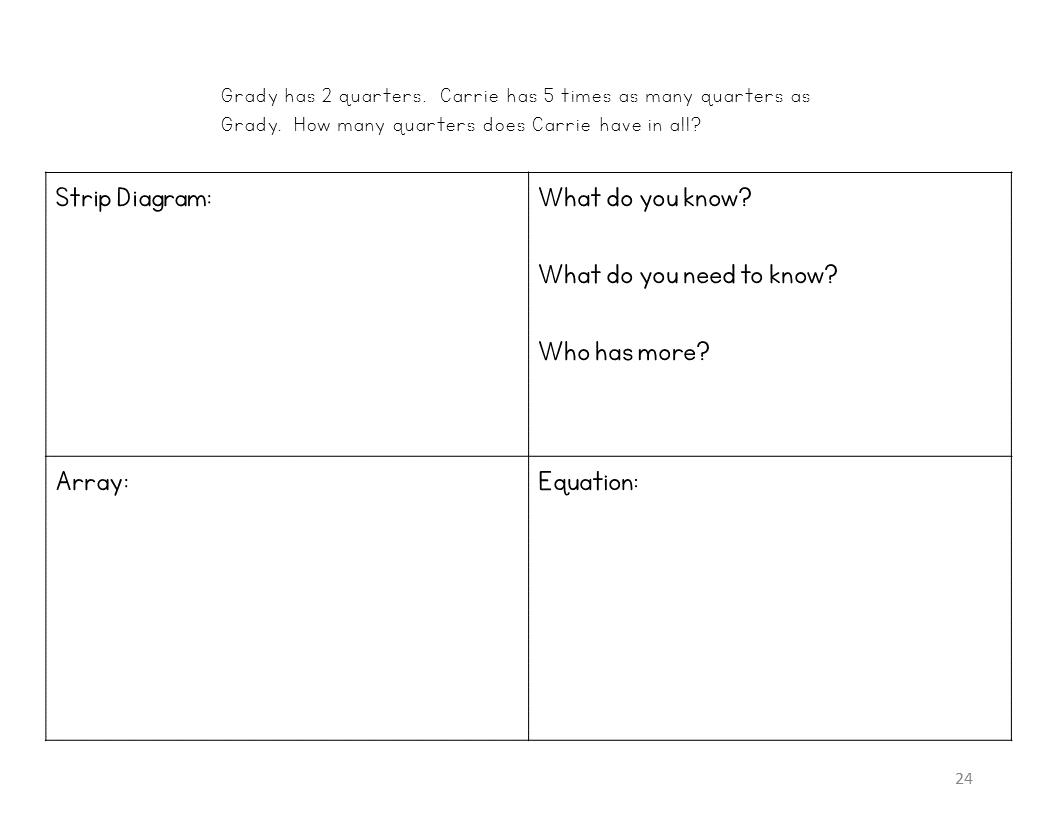
 The next type is a comparison problem. This one is difficult. The strip diagram is essential to solve comparisons with multiplication. Teach it to them now if you have not already! The problem solving mat looks like this:
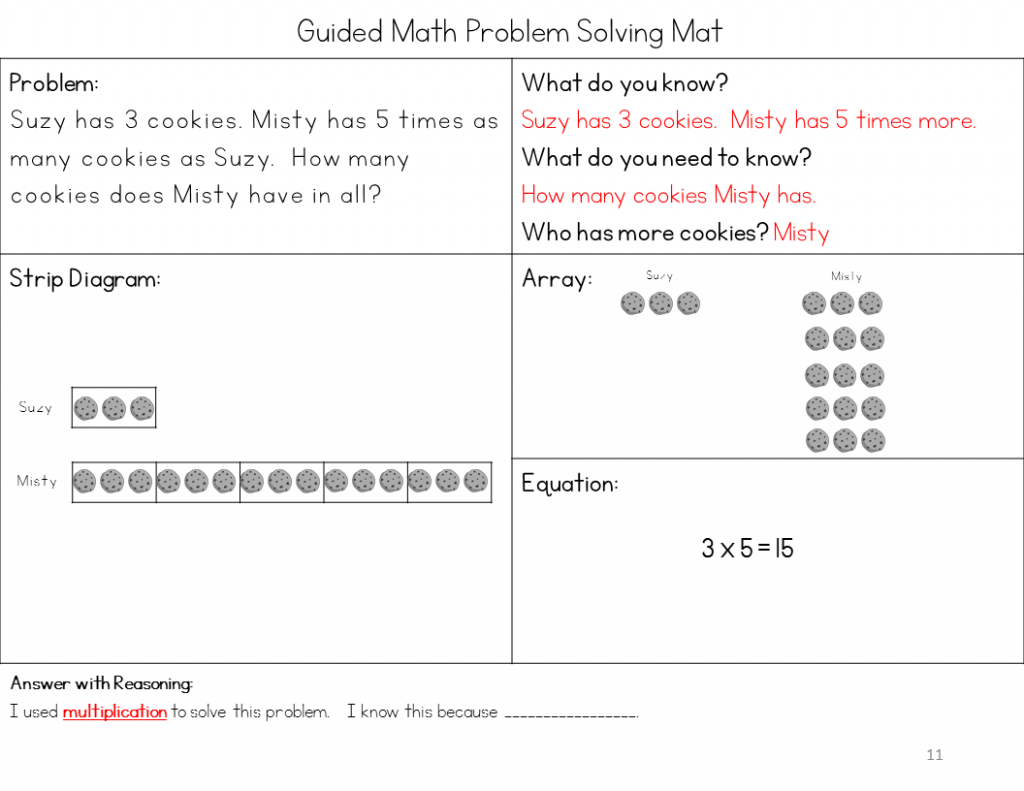
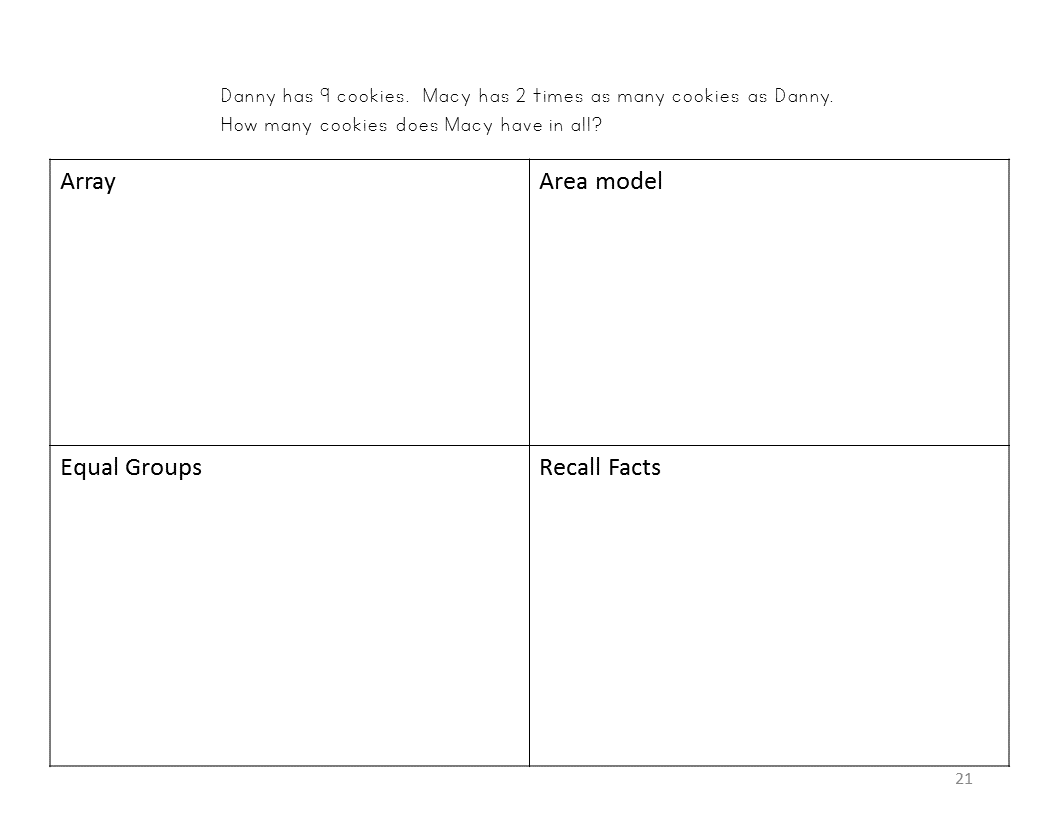
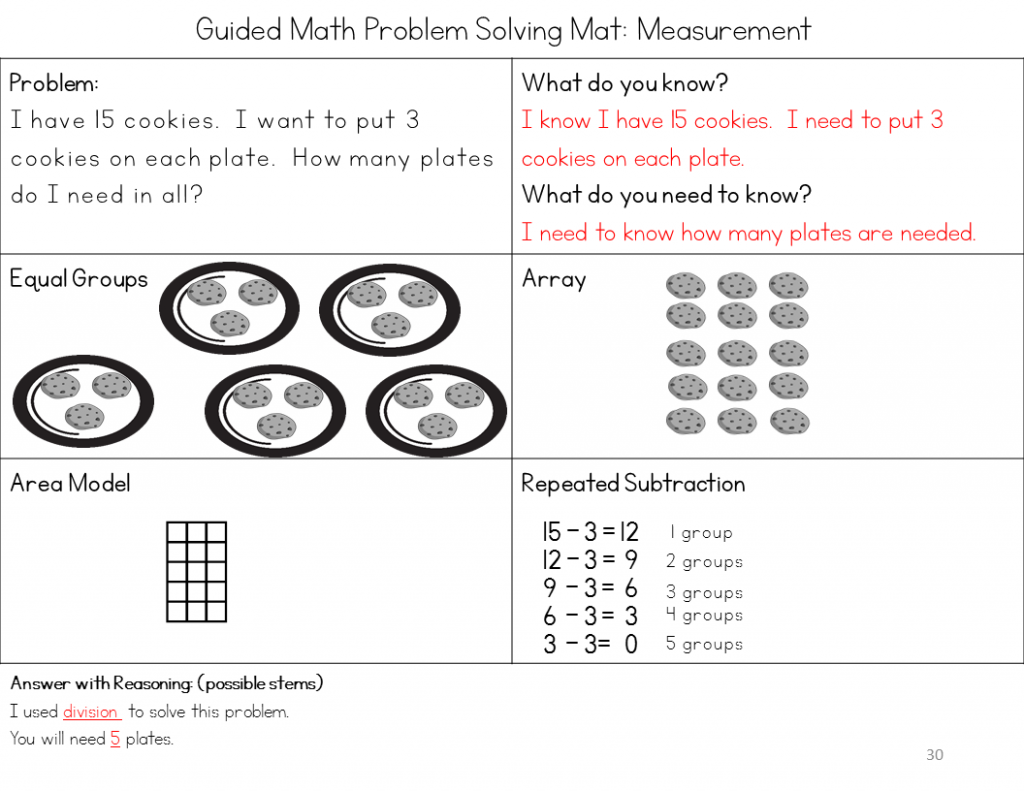
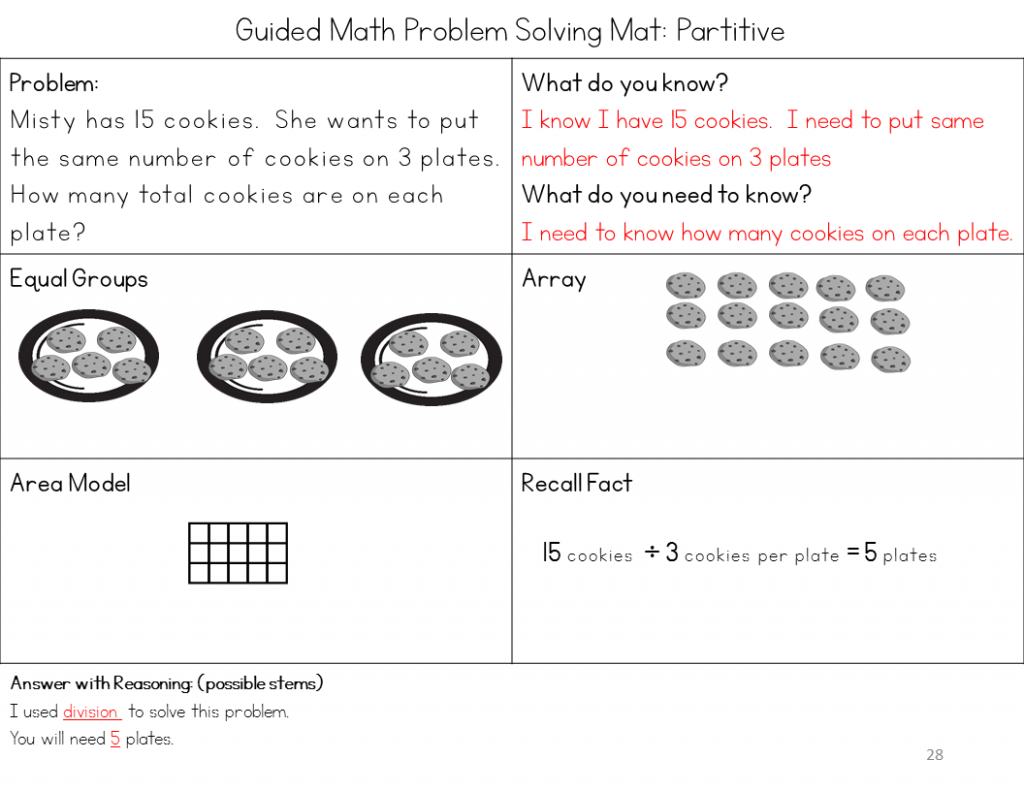
 Measurement is tricky – you don’t know how many groups you will need. Kids have 15 cookies in their hands and are unsure how to start grouping them. Start by putting 3 cookies in a group, then make another group until you are out of cookies. Talk and talk some more! Look at the other strategies – array, area model, and repeated subtraction! Show repeated subtraction last because it is the easiest and you want them to try to visualize equal groups first.