


The instructions to build the boards are below:
Materials:
3 Project Display Boards cut in half
Command hooks:
36 Mini clear and 10 medium white
21 Sheet protectors
Colored Paper for printing signs
Spray adhesive
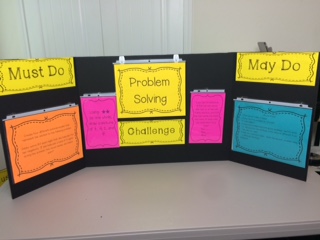
Finished Product: (Steps Below)
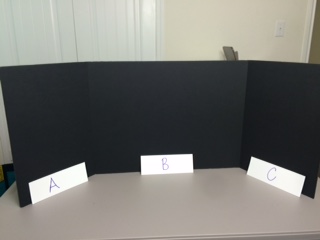
Step 1:
Cut the project boards in half.
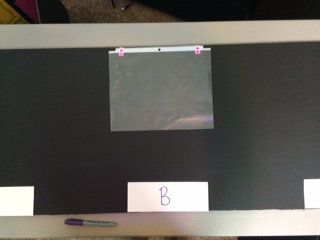
Step 2:
Using a sheet protector as a guide, position command hooks in the center of Section B.
Step 3:
Use spray adhesive to glue the Must Do, May Do and Challenge labels to the board.
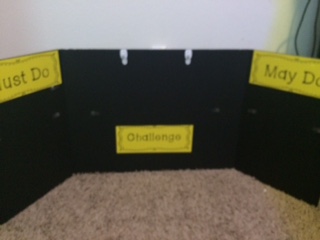
Step 4:
Repeat this process with all 5 boards.
Each station is slightly different, so the small clear hooks are positioned in different places. Follow the directions for each station board.
Individual Boards:
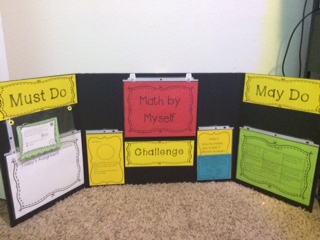
Math by Myself:
Cut 2 sheet protectors in half. Tape one side of the halves to create a pockets.
Section A:
Put a whole sheet protector on the bottom of section A. (This sheet is for Today’s Assignment.) Attach hooks.
Put a 1/2 sheet above the whole sheet for task cards. Punch holes in the top of the 1/2 sheet and attach hooks.
Section B
Put the two half sheets on either side of the title and challenge labels. Attach hooks.
Section C
Put a whole sheet protector on the bottom of section C. Attach hooks.
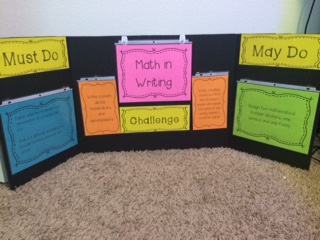
Math in Writing:
Cut 1 sheet protector in half. Tape one side of the halves to create a pockets.
Section A:
Put a whole sheet protector on the bottom of section A. Attach hooks.
Section B
Put the two half sheets on either side of the title and challenge labels. Attach hooks.
Section C
Put a whole sheet protector on the bottom of section C. Attach hooks.
Problem Solving:
Cut 1 sheet protector in half. Tape one side of the halves to create a pockets.
Section A:
Put a whole sheet protector on the bottom of section A. Attach hooks.
Section B
Put the two half sheets on either side of the title and challenge labels. Attach hooks.
Section C
Put a whole sheet protector on the bottom of section C. Attach hooks.

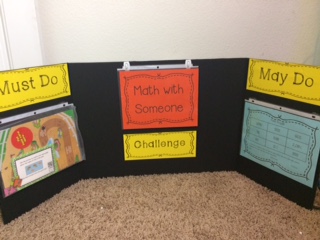
Math with Someone:
Section A:
Put a whole sheet protector on the bottom of section A. Attach hooks.
Section B
Put the two half sheets on either side of the title and challenge labels. Attach hooks.
Section C
Add a basket below challenge for task cards or puzzle games.
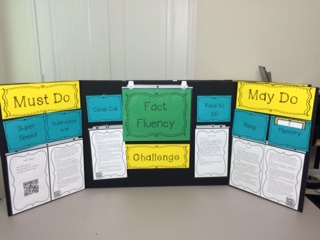
Fact Fluency:
6 Games are on this board- 2 in each section
Cut 3 sheet protectors in half. Tape one side of the halves to create a pockets.
Section A:
Put 2 1/2 sheet protectors on the bottom of section A. Put a command hook above each sheet protector for a game label. The labels are 1$ sheets. Attach hooks.
Section B
Put the two half sheets on either side of the title and challenge labels. Attach hooks. Put a command hook above each sheet protector for a game label. The labels are 1/4 sheets. Attach hooks.
Section C
Put 2 1/2 sheet protectors on the bottom of section A. Put a command hook above each sheet protector for a game label. The labels are 1$ sheets. Attach hooks.
This year, I plan to be prepared for the question, "What do I put in the stations?"!